
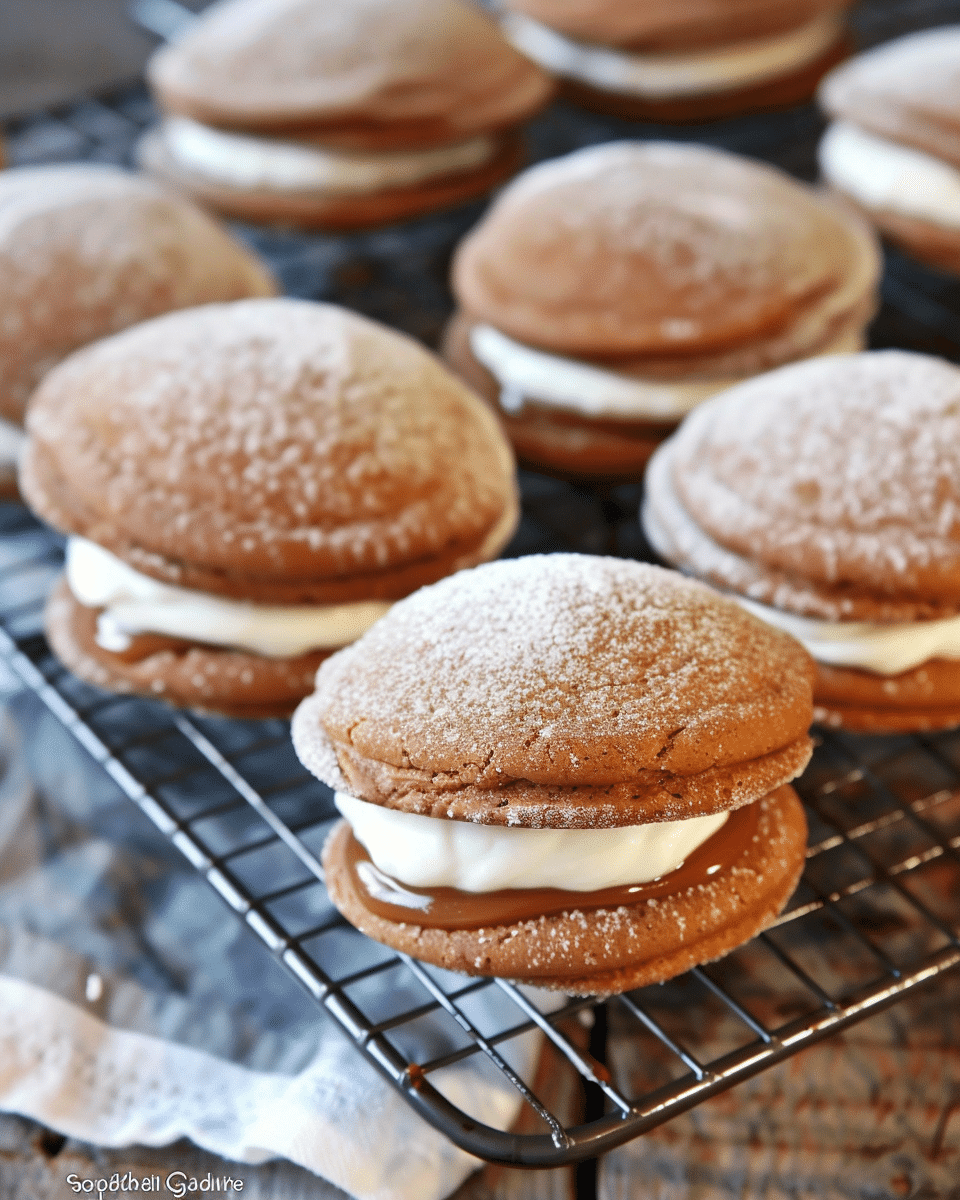

Apple Cider Whoopie Pies are one of my favorite fall desserts to make. I love how the soft, spiced cake-like cookies sandwich a creamy filling, creating a treat that’s both nostalgic and seasonal. The apple cider adds a tangy sweetness, while the warm spices make every bite taste like autumn. These are perfect for sharing at fall gatherings, Halloween parties, or just enjoying with a cup of tea or cider.
Why You’ll Love This Recipe
I enjoy this recipe because it combines the coziness of apple cider with the fun of a whoopie pie. The cakes are moist, flavorful, and slightly chewy, while the filling is smooth and sweet. I like that they feel festive without being overly complicated to make. They’re a crowd-pleaser and always get me in the mood for fall.
Ingredients
For the Cakes:
2 cups all-purpose flour
1 teaspoon baking powder
1/2 teaspoon baking soda
1/2 teaspoon salt
1 teaspoon cinnamon
1/2 teaspoon nutmeg
1/2 cup unsalted butter, softened
1 cup brown sugar
1 large egg
1 teaspoon vanilla extract
1/2 cup reduced apple cider (boiled down from 1 cup for stronger flavor)
1/2 cup buttermilk
For the Filling:
1/2 cup unsalted butter, softened
1 cup marshmallow fluff or cream
1 1/2 cups powdered sugar
1 teaspoon vanilla extract
2–3 tablespoons apple cider
(Tip: You’ll find the full list of ingredients and measurements in the recipe card below.)
Directions
Prepare the Cakes:
I preheat my oven to 350°F (175°C) and line two baking sheets with parchment paper.
In a medium bowl, I whisk together the flour, baking powder, baking soda, salt, cinnamon, and nutmeg.
In a large bowl, I cream the butter and brown sugar until fluffy, then beat in the egg and vanilla.
I stir in the reduced apple cider.
I alternate adding the dry ingredients and buttermilk, mixing until just combined.
Using a cookie scoop, I drop batter onto the baking sheets, leaving space between each.
I bake for 10–12 minutes, until the cakes are set and spring back lightly. I let them cool completely before filling.
Make the Filling:
I beat the butter until smooth, then add marshmallow fluff and powdered sugar.
I mix in vanilla and enough apple cider to create a creamy, spreadable filling.
Assemble the Whoopie Pies:
I spread or pipe the filling onto the flat side of one cake and top with another to make a sandwich.
I repeat until all whoopie pies are assembled.
Servings and Timing
This recipe makes about 12 whoopie pies. Prep time is 20 minutes, bake time is 12 minutes, and cooling/assembly takes another 20 minutes.
Variations
I like to:
-
Roll the edges in crushed graham crackers or cinnamon sugar for extra flavor.
-
Add a drizzle of caramel sauce to the filling for a richer twist.
-
Swap the marshmallow filling with cream cheese frosting for tanginess.
Storage/reheating
I store whoopie pies in an airtight container at room temperature for up to 2 days or in the refrigerator for up to 5 days. They can also be frozen (individually wrapped) for up to 2 months. No reheating is needed, but I let chilled or frozen pies come to room temperature before serving.

FAQs
Can I use store-bought apple cider?
Yes, I often use store-bought cider and reduce it on the stove for stronger flavor.
Can I make the cakes ahead of time?
Yes, I bake the cakes a day in advance and store them in an airtight container before filling.
Can I freeze Apple Cider Whoopie Pies?
Yes, I freeze them individually wrapped for up to 2 months, then thaw before serving.
Can I make mini whoopie pies?
Yes, I scoop smaller portions of batter to make bite-sized versions.
Can I use apple juice instead of apple cider?
Yes, but I prefer cider since it has a deeper, spiced apple flavor.
Conclusion
Apple Cider Whoopie Pies are a soft, sweet, and spiced treat that I love baking in the fall. The combination of tender apple cider cakes and creamy filling makes them irresistible. Whether for a festive party or just a cozy night in, these whoopie pies are the perfect seasonal indulgence.
Apple Cider Whoopie Pies

5 Stars 4 Stars 3 Stars 2 Stars 1 Star
No reviews
Apple Cider Whoopie Pies are a festive fall dessert made with soft, spiced cake-like cookies sandwiched around a creamy apple cider filling. The tangy sweetness of apple cider and warm spices make them a cozy, nostalgic treat perfect for autumn gatherings.
- Author: Sarah
- Prep Time: 20 minutes
- Cook Time: 12 minutes
- Total Time: 52 minutes (including cooling and assembly)
- Yield: 12 whoopie pies
- Category: Dessert
- Method: Bake
- Cuisine: American
- Diet: Vegetarian
Ingredients
For the Cakes:
2 cups all-purpose flour
1 teaspoon baking powder
1/2 teaspoon baking soda
1/2 teaspoon salt
1 teaspoon cinnamon
1/2 teaspoon nutmeg
1/2 cup unsalted butter, softened
1 cup brown sugar
1 large egg
1 teaspoon vanilla extract
1/2 cup reduced apple cider (boiled down from 1 cup)
1/2 cup buttermilk
For the Filling:
1/2 cup unsalted butter, softened
1 cup marshmallow fluff or cream
1 1/2 cups powdered sugar
1 teaspoon vanilla extract
2–3 tablespoons apple cider
Instructions
- Preheat oven to 350°F (175°C) and line two baking sheets with parchment paper.
- In a medium bowl, whisk flour, baking powder, baking soda, salt, cinnamon, and nutmeg.
- In a large bowl, cream butter and brown sugar until fluffy. Beat in egg and vanilla, then stir in reduced apple cider.
- Alternate adding dry ingredients and buttermilk, mixing until just combined.
- Drop batter onto prepared baking sheets using a cookie scoop, leaving space between each. Bake 10–12 minutes, until set and springy. Let cool completely.
- For the filling: Beat butter until smooth, then add marshmallow fluff and powdered sugar. Mix in vanilla and apple cider until creamy and spreadable.
- Assemble whoopie pies by spreading or piping filling on the flat side of one cake and topping with another. Repeat with remaining cakes.
Notes
Roll edges in crushed graham crackers or cinnamon sugar for extra flavor.
Add caramel drizzle to the filling for richness.
Swap marshmallow fluff with cream cheese frosting for tang.
For bite-sized treats, make mini whoopie pies with smaller scoops of batter.
Nutrition
- Serving Size: 1 whoopie pie
- Calories: 310
- Sugar: 32g
- Sodium: 200mg
- Fat: 14g
- Saturated Fat: 8g
- Unsaturated Fat: 5g
- Trans Fat: 0g
- Carbohydrates: 45g
- Fiber: 1g
- Protein: 3g
- Cholesterol: 55mg


